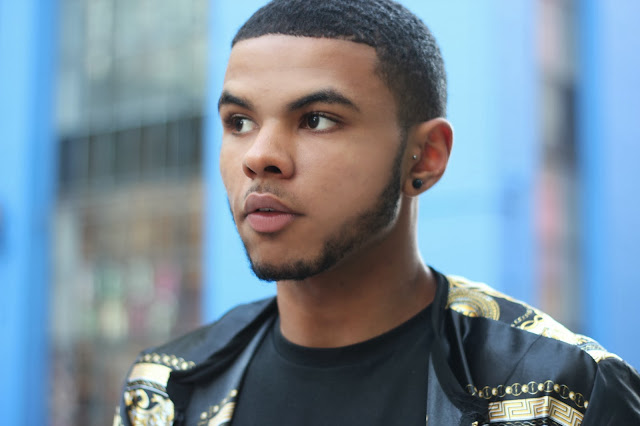
Original Image
This is a photograph which I wanted to use as a portrait image in my portfolio for this project I am working on outside of college projects. Recently photographing clothing for Emily-Kate Siviter who is designing clothing for young male target audience but she will be ranging further for her target audience and I will be aiming to make a portfolio for her and myself of her clothing she has designed.
For this image in particular I really like the close up portraits using my 50 ml lens but as it is a close image you get all details in the skin on your image, as this young lad had a very blemished face I wanted to clear out any imperfections and to make his skin a lot clearer.
I started by using the 'Patch' tool on photo shop cs6:
Starting with the bold blemishes which needed erasing that will make it easier for me to "Airbrush" my image.
As you can see i have mini bridge open at the bottom of my photo shop to make it easier to select which images i want to edit clearly rather than having to go into each folder and find the image and then open them individually on photo shop
Once I had 'Patched' out all the larger blemishes on my subject skin I thought next I will crop my images to no exactly how close up I want my image.
As this is a portrait image for an A4 sketchbook I chose to crop my images 8 x 10 inch so it will fit nicely in my sketchbook leaving room for a border if one was wanted.
After 'Cropping' I came to the 'Airbrushing' this is a cheat way of clearing up the skin on a model also not the most professional way but I find it a lot easier and still effective.
I use the 'Brush' tool on my photo shop and put the opacity right down this is after I have cloned the original layer so later on I can change the opacity of the whole image which I have edited on if it is to much airbrushing.
For the 'Airbrushing' I would use the colour picker and select the picker each time I wanted to go over and area of the face, by using the brush and lowering the opacity it give a light brush over the face as if you was covering the skin with makeup.
Once I went over the face clearly I noticed it looked a bit to 'Airbrushed' so I lowered the opacity on the layer so you could still see a few details in the skin.
Also I tried this 'Airbrushing' on the lips on my model just to get rid of a few of the creases in his lips to make them look more clear and flawless.
Once all the skin was blemish free, I noticed the beard on the model was slightly patchy so I used the 'Healing tool' in a way it cloned areas I clicked on of the beard and placed it over the patchy sections.
I'm pleased with the final result of this portrait image, I'm feeling more confident to use photo shop but I will still be watching tutorials on photo shop skills to give me new ideas each time I come to edit an image.
Final Edited Image